Enable SSH login and use root account on your Debian 9 server.
- Install Apache
apt-get update && apt-get upgrade
apt-get install apache2
Edit /etc/apache2/mods-available/mpm_prefork.conf in your text editor and edit the values as needed to optimize:
nano /etc/apache2/mods-available/mpm_prefork.conf

Disable mpm_event module:
a2dismod mpm_event
Enable mpm_prefork module:
a2enmod mpm_prefork
Restart Apache:
systemctl restart apache2
- Install MySQL:
apt-get install mysql-server
We need to run mysql_secure_installation in order to remove the test database and any extraneous user permissions added during the initial installation process:
mysql_secure_installation
If you already have secure root password you no need to select (y) on first question, but on all other questions select (y).
- Set Up a MySQL Database
You need to create a database and grant your users permissions to use databases.
Log in to MySQL:
mysql -u root -p
Use MySQL’s root password when requested.
Create a database and grant your users permissions on it.
Replace the database name (icinga), username (icinga) and the password (icinga) with your credentials:
create database icinga;
grant all on icinga.* to ‚ icinga ‚ identified by ‚ icinga ‚;
Exit from MySQL console:
Quit
- Install PHP7.1
PHP 7.1 is most compatible with Icinga2 and IcingaWeb2.
First, we need to add the sury.org repository, which have packages PHP 7.1 for Debian 9:
apt install lsb-release apt-transport-https ca-certificates
wget -O /etc/apt/trusted.gpg.d/php.gpg https://packages.sury.org/php/apt.gpg
echo „deb https://packages.sury.org/php/ $(lsb_release -sc) main“ | tee /etc/apt/sources.list.d/php7.1.list
apt update
Now, we can Install PHP 7.1 and the PHP Extension and Application Repository:
apt-get install php7.1 php-pear
Configure PHP
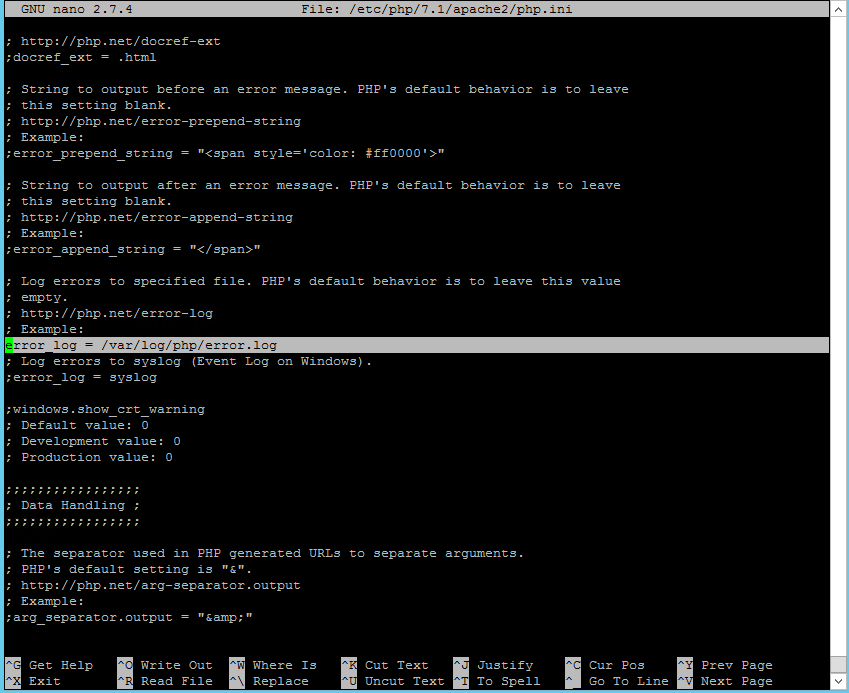
Edit file /etc/php/7.1/apache2/php.ini in your text editor and edit the values error_log = /var/log/php/error.log as needed:
nano /etc/php/7.1/apache2/php.ini
Create the log directory for PHP and give the Apache user ownership:
sudo mkdir /var/log/php
sudo chown www-data /var/log/php
Install php7.1-mysql package for MySQL support in PHP:
apt-get install php7.1-mysql
Restart Apache:
systemctl restart apache2
- Icinga2 installation.
First update your system:
apt-get update && apt-get upgrade
Configure Icinga 2 Databases.
Install the backend database needed by Icinga 2 monitoring web application and Icinga Web 2 frontend to store users, contacts and other collected data. Execute the following command to install MariaDB database and PHP module needed to access MySQL database in Debian 9:
apt install php7.0-mysql mariadb-server mariadb-client
Log in to the MySQL console and secure the MariaDB root account:
mysql -h localhost
use mysql;
update user set plugin=“ where user=’root‘;
flush privileges;
exit
Now secure the MariaDB database with the mysql_secure_installation script. This script will ask a series of questions designed to secure the MariaDB database: change MySQL root password, remove anonymous users, disable remote root logins, and delete the test database:
mysql_secure_installation
Log in to the database console and create the database for Icinga 2:
mysql -u root -p
Create a user with a strong password to manage Icinga2 application database, by typing the following commands. You can replace icingadb, icinga_user, and icinga_pass with your own database name and credentials:
create database icingadb;
grant all privileges on icingadb.* to ‚ icinga_user’@’localhost‘ identified by ‚icinga_pass‘;
flush privileges;
exit
Create the second MySQL database used by Icinga2 web to store its interface users and groups. As in the previous step, replace the database name and credentials accordingly and choose a strong password for database user. You can use the same MySQL user account to manage both databases simultaneously (icinga_user’@’localhost):
create database icinga_users;
grant all privileges on icinga_users.* to ‚icinga_user’@’localhost‘ identified by ‚icinga_pass‘;
exit
- Install Icinga 2
Install Icinga 2 and the Icinga 2 MySQL module for accessing MariaDB database backend:
apt install icinga2 icinga2-ido-mysql
During the installation you will be asked two questions:
First – If Icinga 2 should use the MySQL module? Choose Yes from the prompt.
Second – To configure a database for icinga2-ido-mysql with dbconfig-common option? Choose No from the prompt.
After Icinga 2 has been installed, start the Icinga 2 service and check the daemon status:
systemctl start icinga2.service
systemctl status icinga2.service
- Install the Icinga 2 Web Interface
In order to manage Icinga 2 via the web interface, install the Icinga 2 web interface and Command Line Interface (CLI) packages:
apt install icingaweb2 icingacli
Restart the Icinga 2 daemon and verify the Icinga 2 daemon status:
systemctl restart icinga2.service
systemctl status icinga2.service
- Install the MySQL schema required Icinga 2 database:
mysql -u root icingadb -p < /usr/share/icinga2-ido-mysql/schema/mysql.sql
Edit the Icinga 2 MySQL IDO configuration file and add Icinga 2 engine database credentials, as shown in the following example. Use the credentials of the first database created in the earlier database creation step:
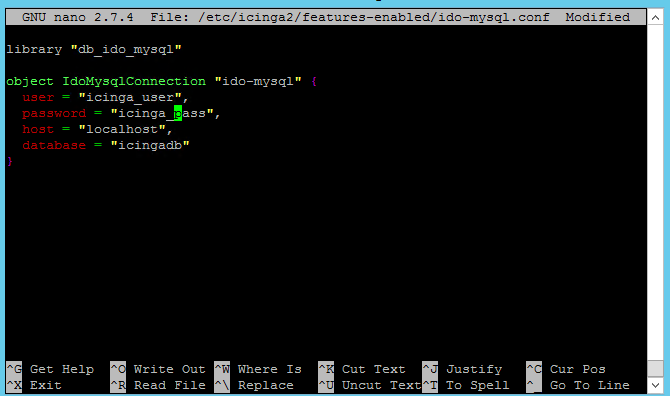
Save the file and restart the Icinga 2 daemon:
systemctl restart icinga2.service
Create an Icinga Web 2 log directory and add the proper file system permissions to grant the Icinga 2 group write permissions:
mkdir -p /var/log/icingaweb2/
chgrp -R icingaweb2 /var/log/icingaweb2/
chmod -R 775 /var/log/icingaweb2/
- Configure Icinga 2 via Web Interface
Generate an installation token and save the token. You will need to use it to access the Icinga 2 setup:
icingacli setup token create
The output of this command is like this example:
The newly generated setup token is: 9568746589651236
In case you’ve forgotten the token or you haven’t noted yet, you can type following command:
icingacli setup token show
Open a browser on your local machine and navigate to http://exampleIP/icingaweb2/setup. Replace exampleIP with yourDebian 9 IP address.
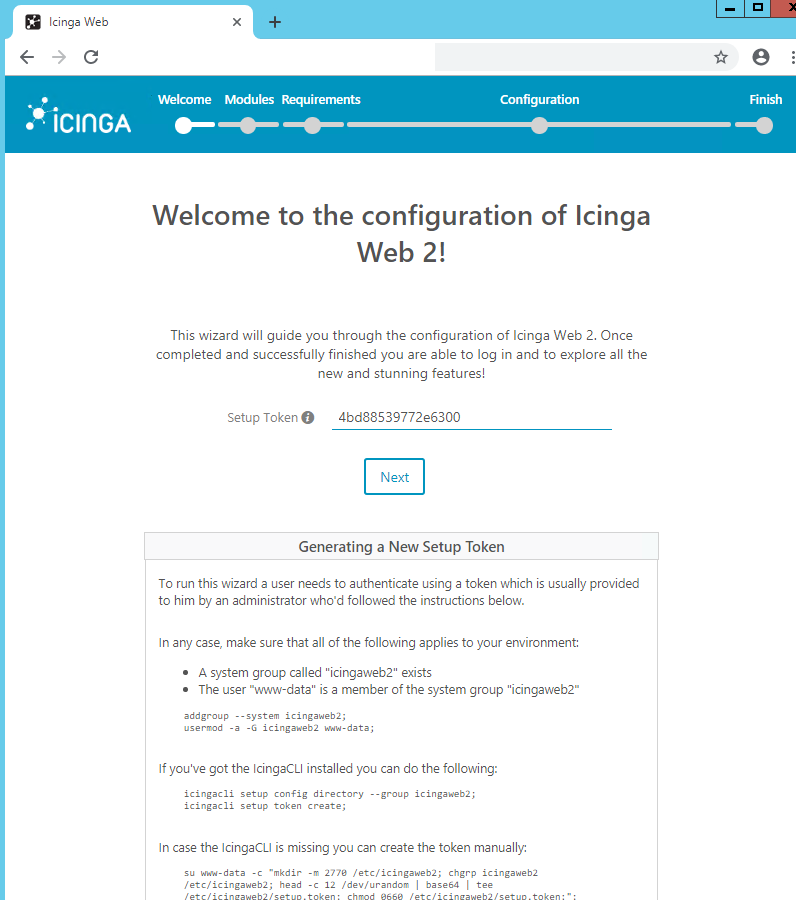
When web page is opened, enter your token and click Enter to continue:
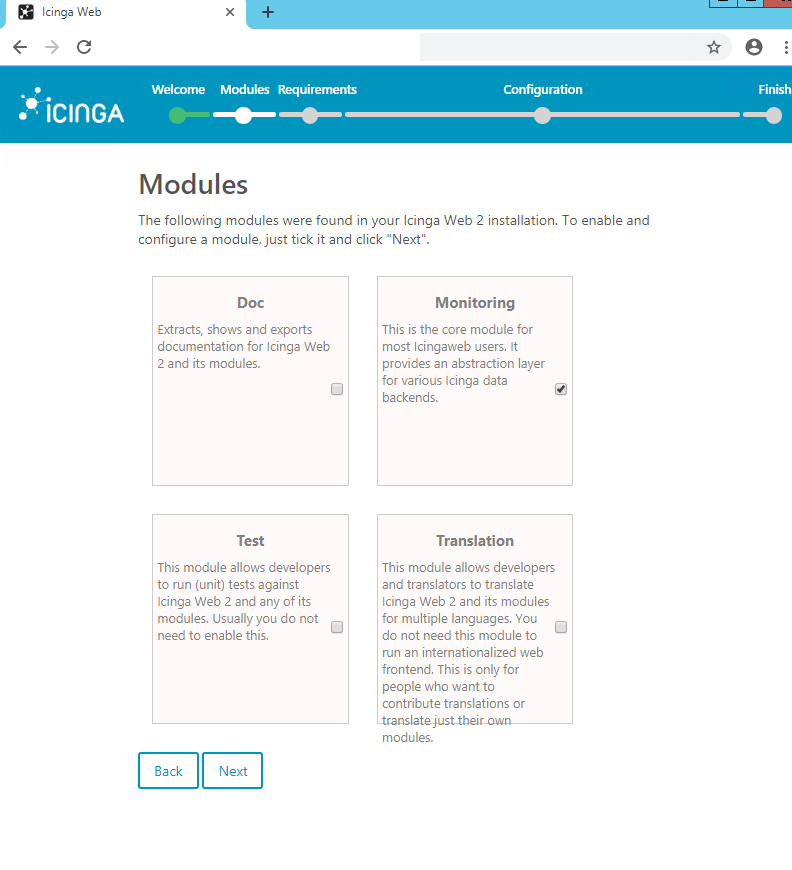
On the next screen, select and enable the Monitoring modules and click Next to continue:
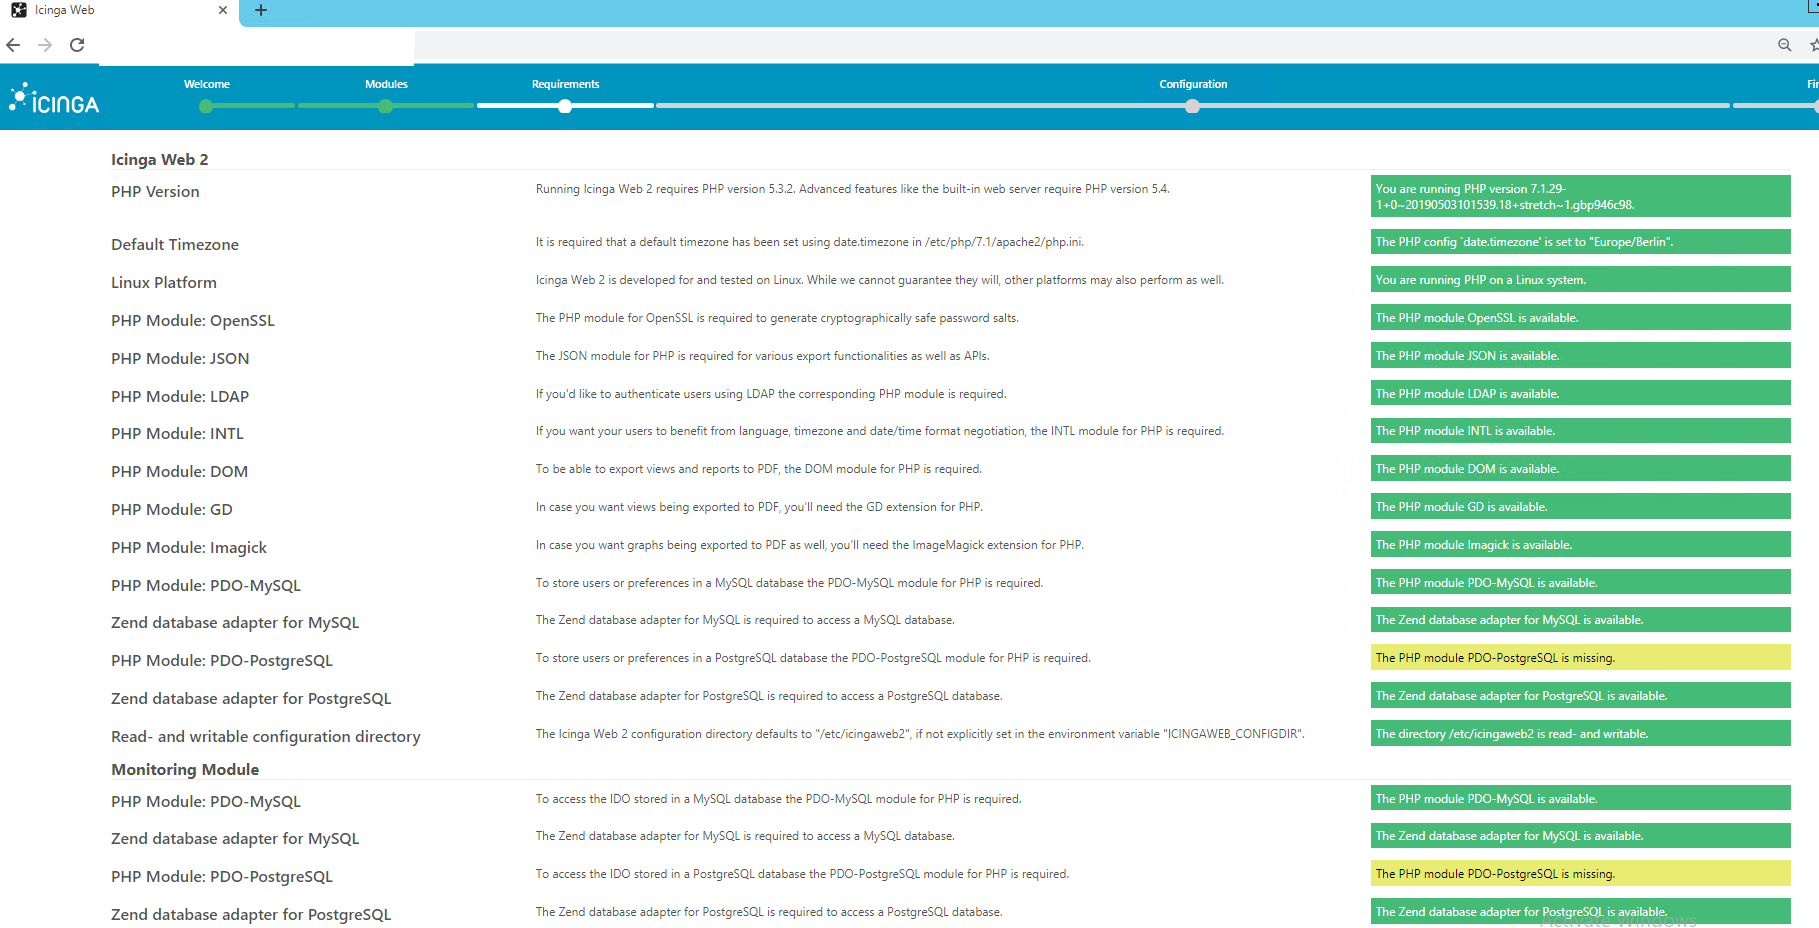
On the next screen Icinga 2 will check your system requirements and PHP modules to see if all requirements are met before continuing with the installation and configuration process. Scroll down to the end of the page and click Next to continue if everything is ok.
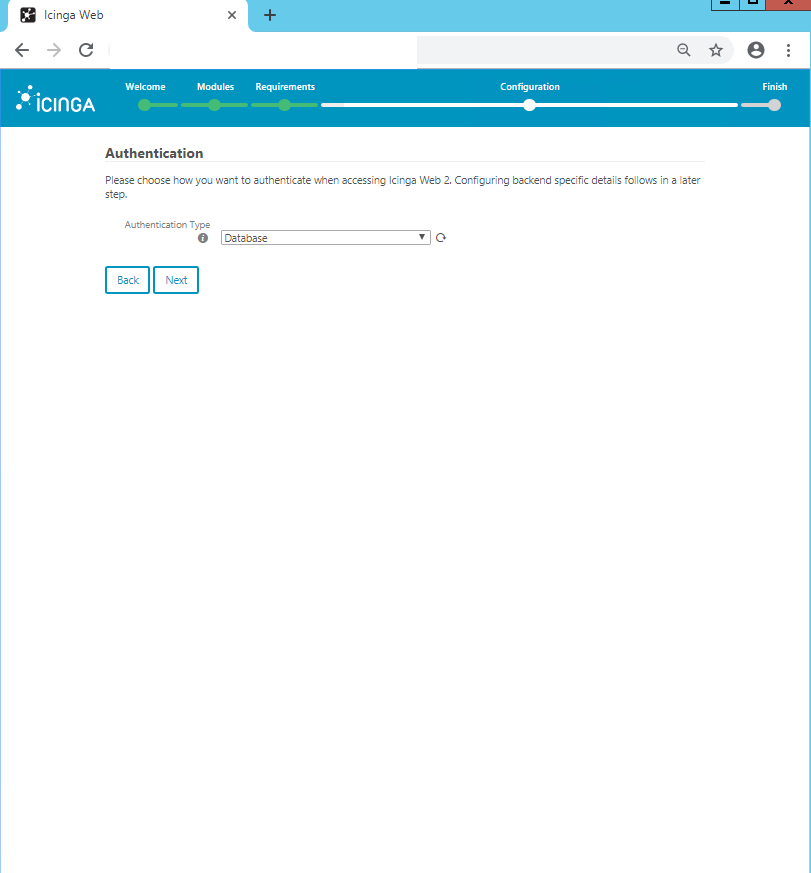
On the next screen Choose Authentication Type = Database and click Next to continue if everything:
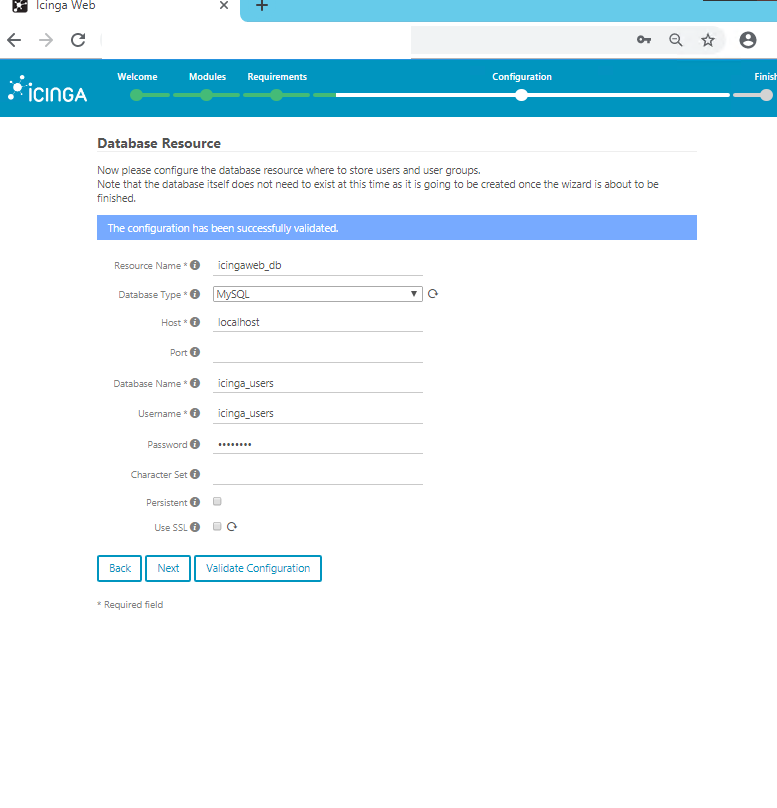
On the next screen use the information from the second database created earlier to add the credentials needed to access the Icinga2 database for storing web interface users and groups. Use icingaweb_db as a name for this resource and leave the Host, Port and Character set variables as default. Do not enable Persistent and SSL option. Press Validate Configuration button to validate the database. After the database has been validated successfully, click Next to continue:
Define a name for the database authentication backend (you can use the default value) and click Next to continue.
Add a username with a strong password in order to log in to the Icinga 2 web interface and further manage the Icinga 2 engine click Next to continue.
Adjust the Icinga2 application and logging configurations using these settings click Next to continue.
Check Show Stacktraces
Storage Type = Database
Logging Type = File
Logging Level = Error
File path = /var/log/icingaweb2/icingaweb2.log
Review the information report on the next page and click Next to continue:
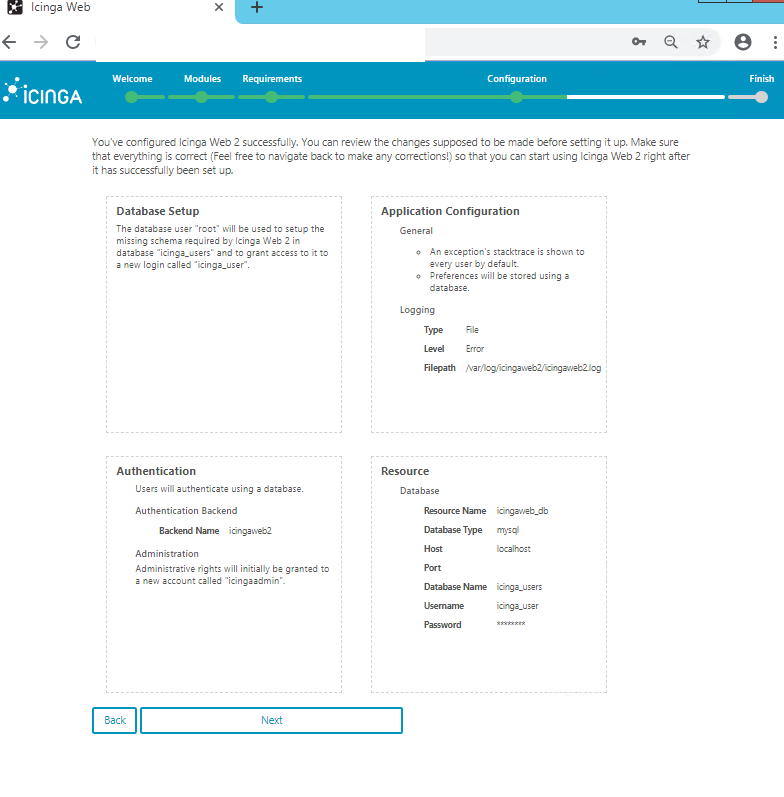
Click Next to continue setting up Icinga 2 engine monitoring module.
Add a name for the Icinga 2 Backend, select IDO as Backend Type and click Next to continue.
Add the Icinga 2 engine database credentials in order to setup the IDO resource environment. After adding the Icinga 2 database credentials, press Validate Configuration to validate the Icinga 2 Monitoring IDO Resource. After the Successfully validated message appears, click Next to continue.
Configure the Icinga 2 Command Transport module with the following settings and click Next to continue.
Transport Name = icinga2
Transport Type = Local Command File
Command File = /var/run/icinga2/cmd/icinga2.cmd
Use the default values or configure the monitoring security environment variables to sensitive information and click Next to continue.
The next screen shows a detailed report of the current configuration. A message will also show you that Icinga 2 Monitoring module has been successfully configured. Review the configuration and click Finish to complete the setup process.
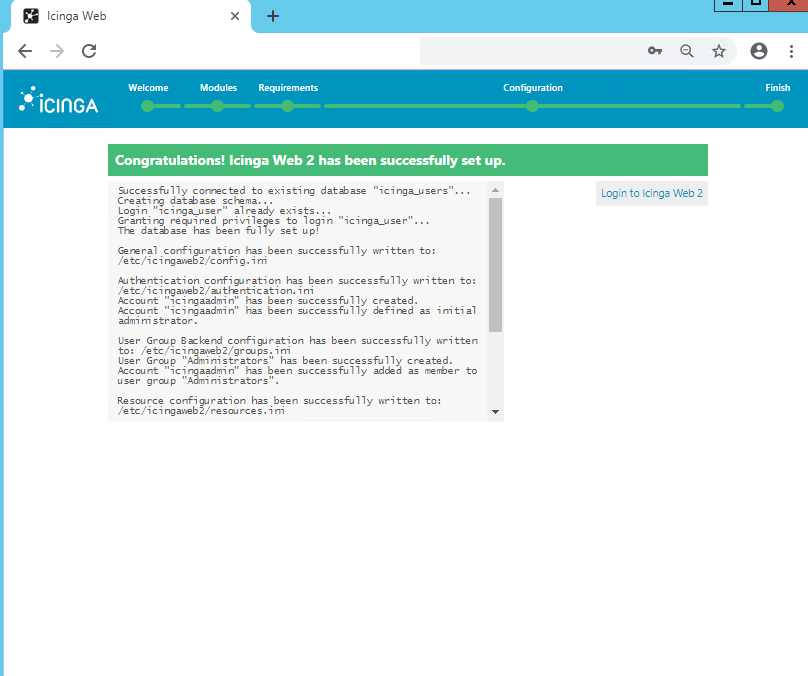
After the installation and setup process completes, a message informs you that Icinga Web 2 has been successfully set up.
Log in to Icinga Web 2 to exit the setup process and log in to Icinga Web 2 login webpage:
Enjoy your professional monitoring solution.


